
Homemade Burger Buns
Though I don’t share a lot of meat recipes on this blog — I’m not a vegetarian, just more of a vegetables-and-pasta kind of girl, fyi — I do very much appreciate a good hamburger. I could, and do, go for a burger most any time of the year, but find them particularly special and nostalgic when eaten in the Summer, preferably at a barbecue with friends. The burger patty should be juicy (lean beef need not apply) and cooked medium-rare; ideally, it’s topped with a slice of tomato and a crisp leaf of lettuce for freshness, and a piece of cheddar cheese, for richness. For extra credit: a little olive oil-y, pepper-y, smashed avocado, whose coolness contrasts nicely with the hot-off-the-grill burger. If accompanied by a pile of extra crunchy, Kettle-cooked potato chips, I will be in summer-dinner-heaven.
You may have noticed that I neglected to mention one of the most important components of the burger, didn’t I? I mentioned the patty, and the toppings, and the side, but not that one essential piece of the puzzle that contains the burger itself?!
The bun, you guys.
Yep — my only gripe with the glorious hamburger is the bun. You see: the average, store-bought burger bun (sold in a pre-sliced pack of six both in the U.S as well as here in Italy) are well, nothing special. They’re one-note, with very little flavor to speak of, and are typically dry and crumbly. The smattering of sesame seeds over the top doesn’t help matters much, falling immediately off the bun in a meek, defeatist sort of way. While I usually toast the standard hamburger bun in an attempt to boost is flavor or texture, I find it makes the bun just tolerable, not exceptional by any means.
As the saying goes: if you want something done right, do it yourself. Or: if you want a good hamburger bun, bake your own.
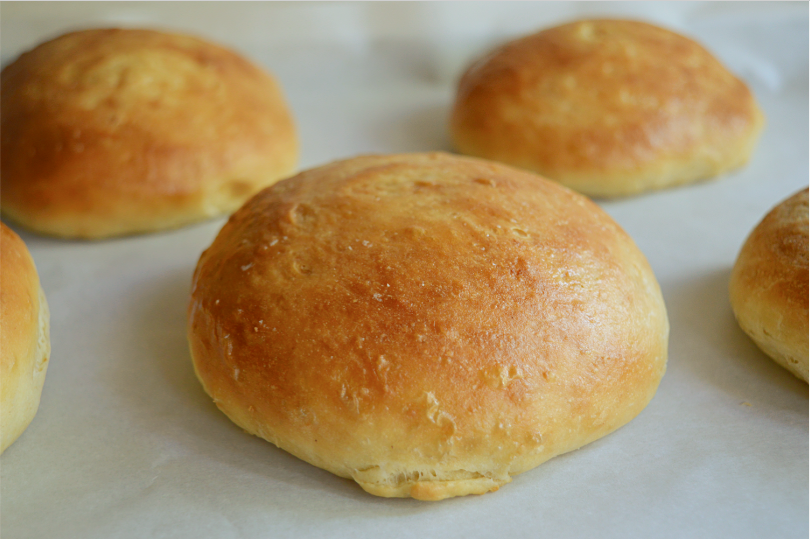
So: DIY hamburger buns are surprisingly easy to make, requiring mixing and minimal kneading with a reasonable rise-time — in terms of homemade bread, it doesn’t really get much easier than this. This recipe makes 8 buns worthy of supporting your favorite patty and toppings, ones that turn the usual mediocre, afterthought of a bun on its head. These are buns Living Their Best Life, soft and fluffy yet still sturdy enough to stand-up to your chosen filling, with a buttery, barely sweet flavor, a satiny crust and a deep golden-brown color. They are perfect with these beef burgers here, but also these white bean or eggplant ones if you’re meat-free, or with whatever burger (turkey, chicken, beef, portobello, or otherwise!) that you like best in the Summer. Bonus: they freeze wonderfully, so you can have a batch of buns at your disposal whenever your burger-loving heart desires.
Next up for me and these buns: a recipe for a burger with caramelized onion and bacon “jam” I’ve had my eye on all summer. Stay tuned…
A couple of notes from King Arthur baking: For best results (a smooth, slightly soft dough), use the smaller amount of water in summer (or in a humid environment), the greater amount in winter (or in a dry climate); and something in between the rest of the time. For slightly smaller buns, divide the dough into 12 pieces instead of 8. Bake the buns for 12 to 15 minutes, instead of 15 to 18 minutes. For slider (mini burger) buns, make them about 3" in diameter. Divide the dough into 24 pieces, and bake for 12 to 15 minutes. Store leftover buns, well-wrapped, at room temperature for several days; freeze for longer storage.
A couple of notes from me: Feel free to make these with sesame seeds, if you wish; I went without but have also included instructions if you want to add them. The recipe below calls for instant yeast, but I used regular dry yeast with great results; I let the dough rise about 2 hours on the first round, and an hour once shaped.
Looking for other homemade bread recipes? Click here.
For more Summer recipes, click here.
HOMEMADE BURGER BUNS
Makes 8 burger buns. Recipe from www.kingarthurbaking.com.
Ingredients for buns:
3/4 to 1 cup (170g to 227g) water, lukewarm
2 tablespoons (28g) butter, at room temperature
1 large egg
3 1/2 cups (420g) all-purpose flour
1/4 cup (50g) sugar
1 1/4 teaspoons salt
1 tablespoon instant (9g) instant yeast (see my notes above)
Ingredients for butter glaze:
3 tablespoons (43g) butter, melted; divided
Seed topping (optional): 1 egg whisked with 2 tablespoons cold water
Sesame seeds, or the seeds of your choice
Directions:
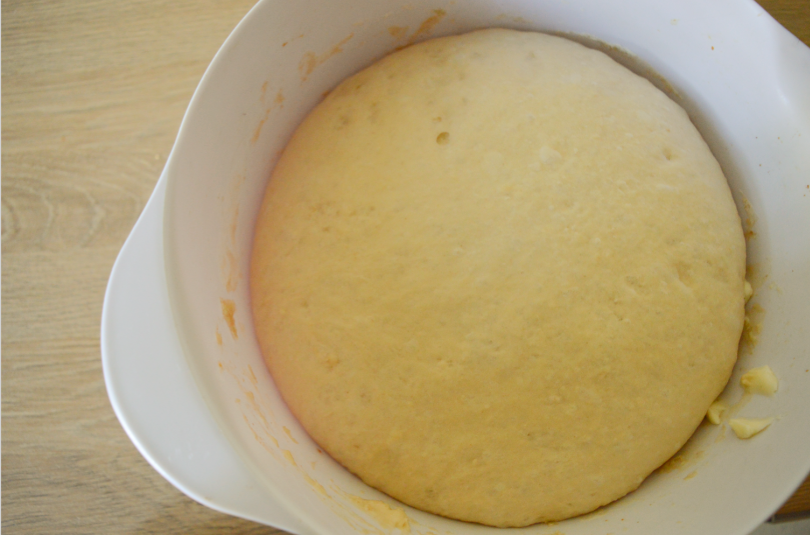
To make the dough: Mix and knead all of the dough ingredients — by hand, mixer, or bread machine — to make a soft, smooth dough. Note that I mixed all my ingredients in a bowl and then kneaded the resulting dough by hand for about 5 minutes. Cover the dough and let it rise until it's nearly doubled in bulk, about 1 to 2 hours (as I used regular dry yeast, not instant yeast, I let mine rise for about 2 hours).

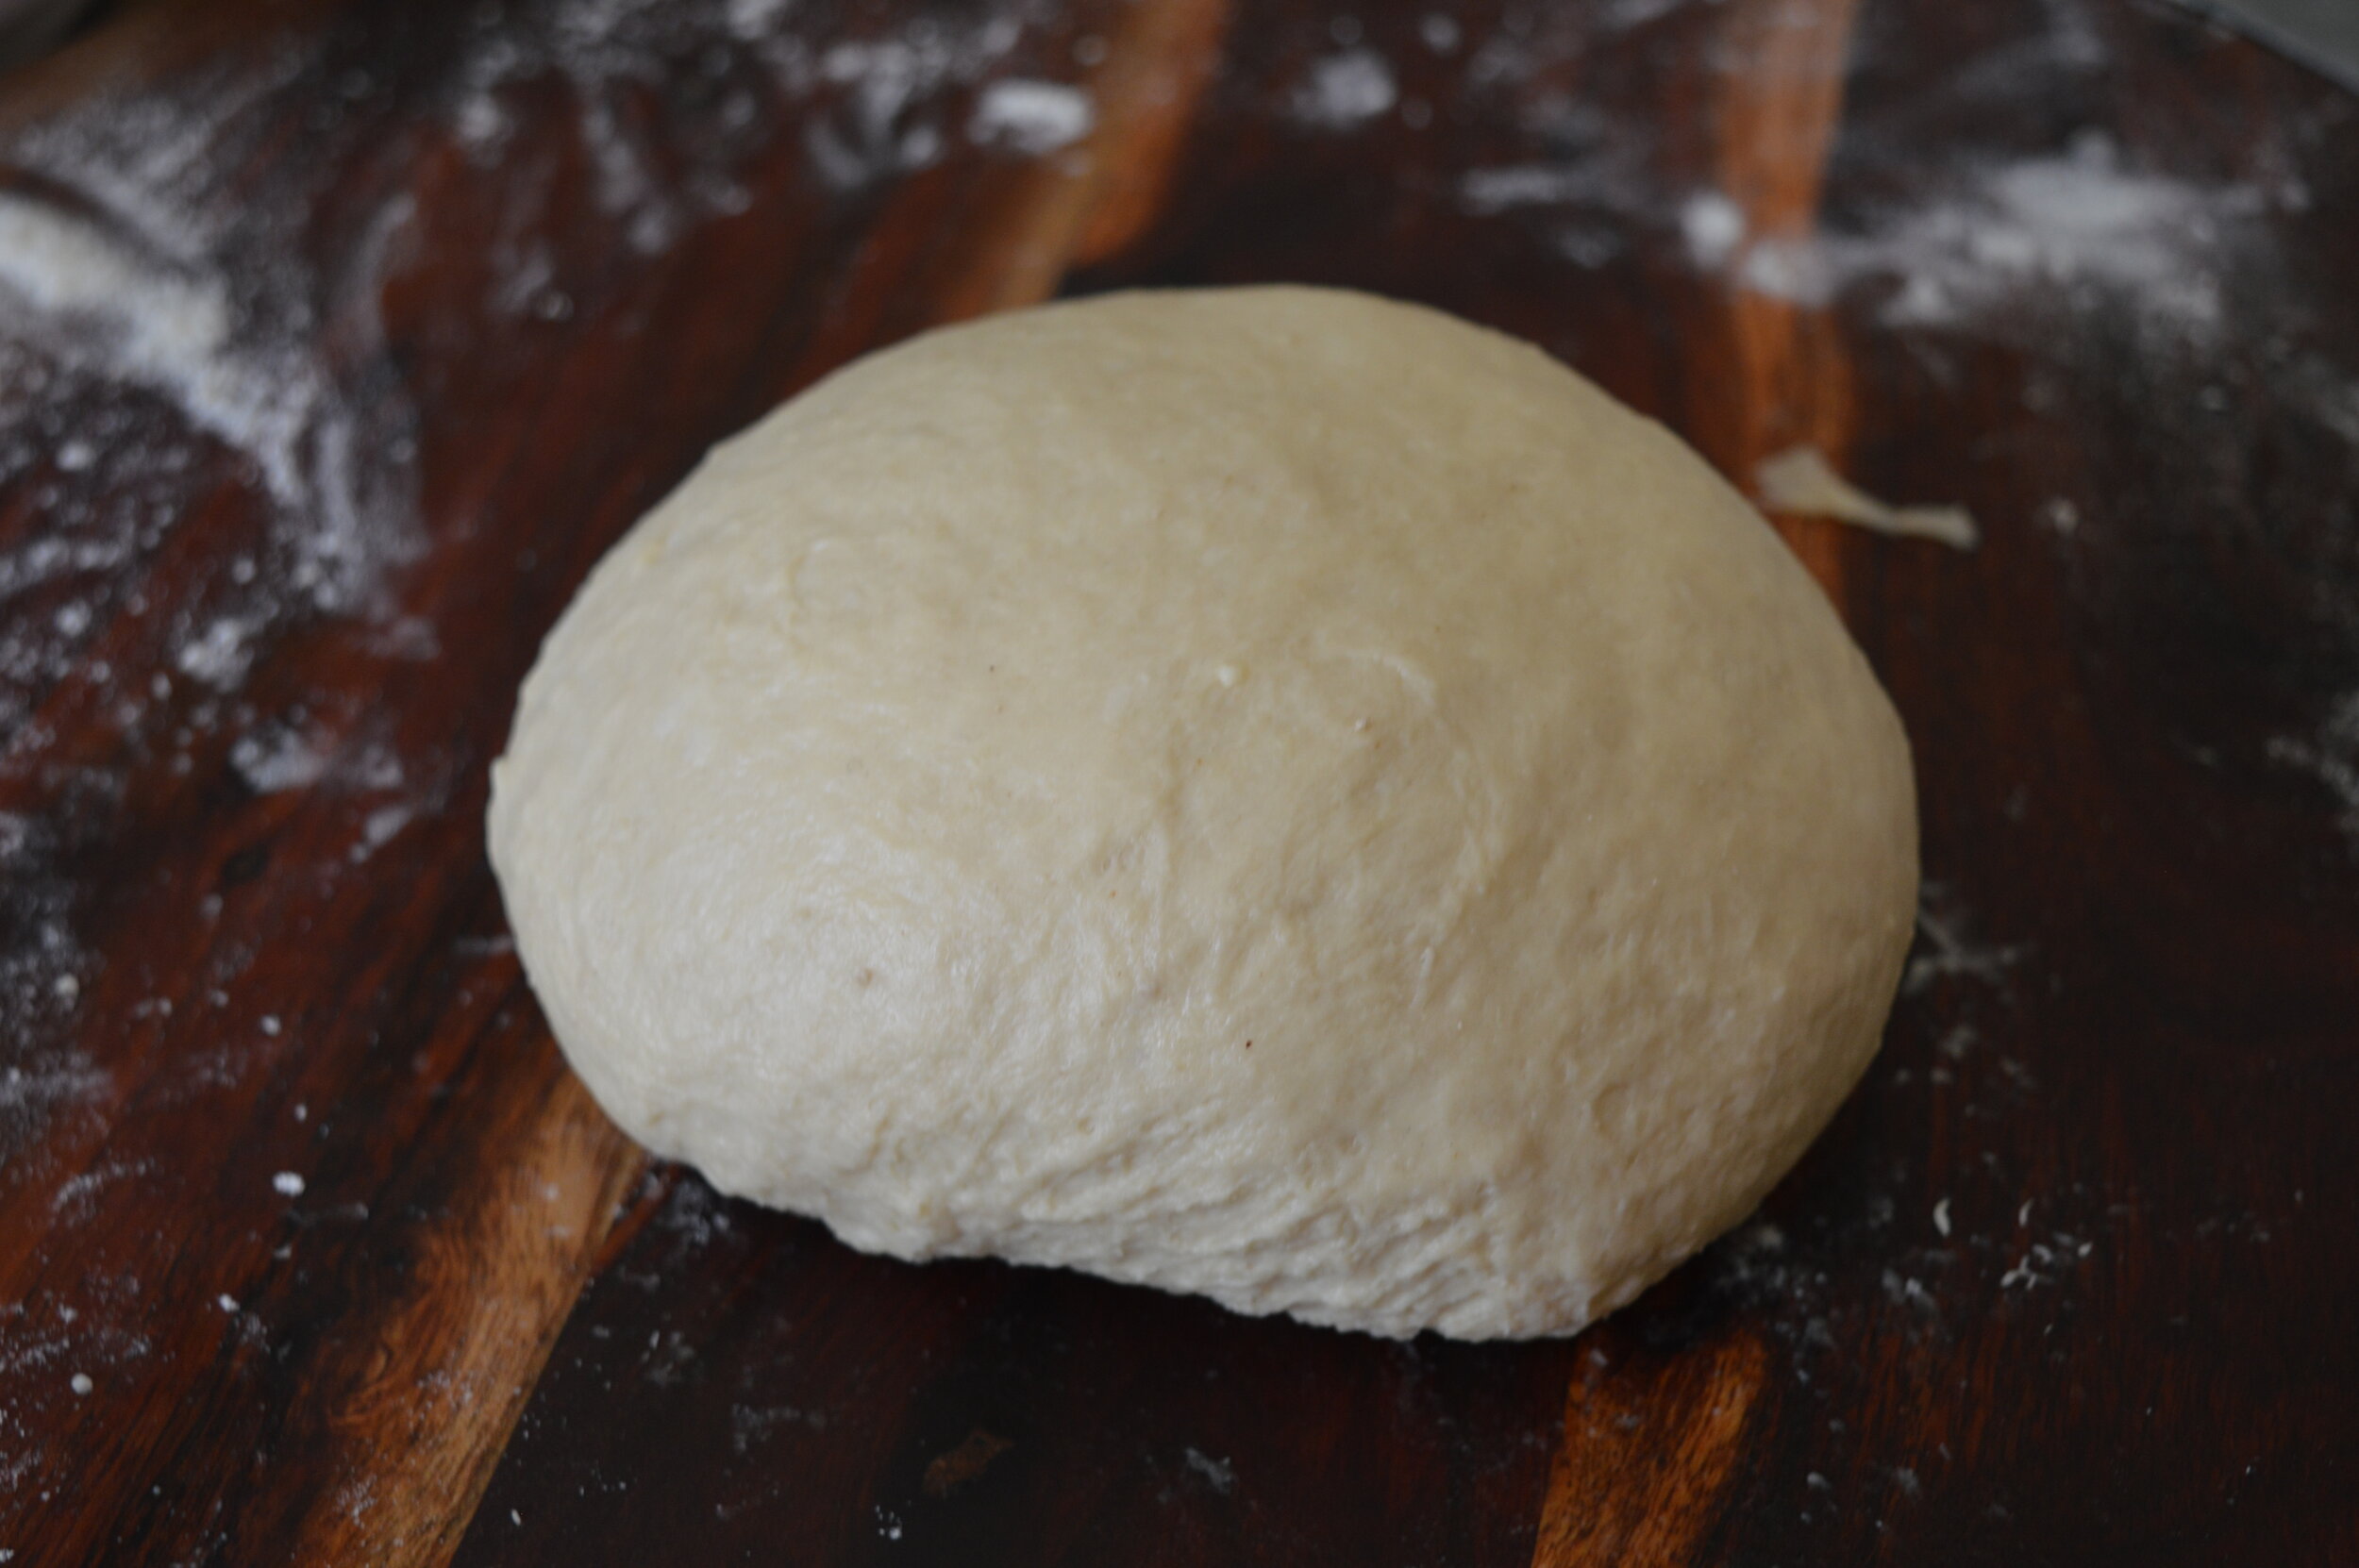
Gently deflate the dough and divide it into eight pieces (about 100g each). Shape each piece into a ball. Flatten each dough ball with the palm of your hand until it's about 3" across. Place the buns on a lightly greased or parchment-lined baking sheet. Cover and let rise until noticeably puffy, about an hour. Toward the end of the rising time, preheat the oven to 375°F.

Brush the buns with about half of the melted butter. To make seeded buns, brush the egg/water mixture right over the melted butter; it'll make the seeds adhere. Sprinkle buns with the seeds of your choice.
Bake the buns for 15 to 18 minutes, until golden. Remove them from the oven and brush with the remaining melted butter; this will give the buns a satiny, buttery crust. If you've made seeded buns apply the melted butter carefully, to avoid brushing the seeds off the buns.
