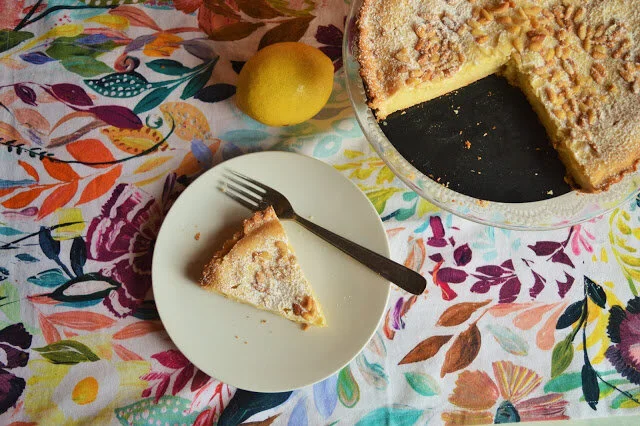
Torta della Nonna
While there is something undeniably rewarding about a finished dish -- the part where pat yourself on the back and admire that cake/lasagne/roast you've made with your own two hands -- I find that the small steps that lead to the end result are usually far more satisfying. There's something marvelous for example about transforming a puddle of barely-there egg whites into a fluffy white cloud to be folded into a souffle with just a little whisking, seeing a pan of batter miraculously rise and puff into a cake in the oven, witnessing a bunch of strong-smelling, tear inducing onions become soft and caramel-y in a pan with some slow cooking, or turning a bowl of butter, powdered sugar, and milk into a smooth, delicious buttercream with just a few whirs of an electric mixer. Indeed, the list goes on and on, but at the very top of it, occupying the #1 spot on my Magical-Kitchen-Moments List, is Making a Pastry Crust. The same magic unfolds every time, and never ceases to delight me. You start by mixing your flour with tiny pieces of cold butter, thinking that the mixture looks impossibly dry -- double check the butter quantity in the recipe here -- until slowly but surely, the bits of butter blend harmoniously into the flour, taking on the appearance of deliciously buttery sand. The water or eggs or even sour cream -- whatever your wet ingredients are -- join the party with just a few turns of a wooden mixing spoon, making the flour and butter become something resembling a dough (!!!) And then it's up to you, the cook, to add some more flour or more liquid to the resulting mixture - your call, judging by how the ingredients are getting along - and to knead the dough the right amount to achieve that perfect pie crust consistency, pliable and smooth, not too sticky and easy to work with. You pat the dough into a little mound -- proudly, I might add -- then leave your masterpiece in the fridge to rest before its big debut.
It's the little things, I suppose.
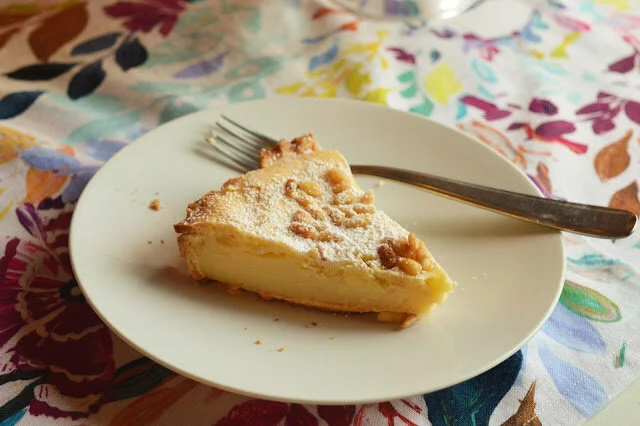
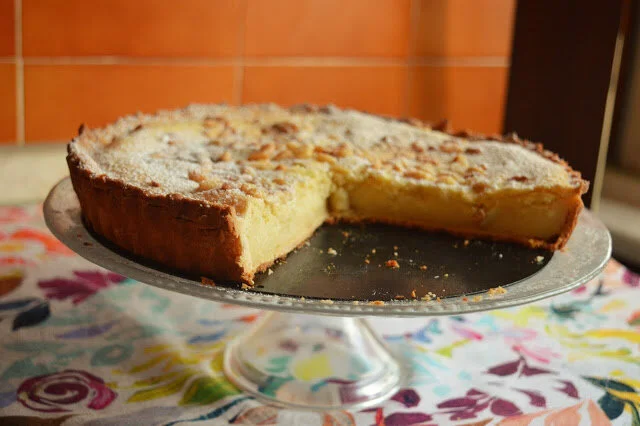
Torta della Nonna is a classic Italian dessert which requires not one, but two magical, glorious, homemade pastry crusts (hurray!!!) In terms of fame it is just behind the better known but no more delicious tiramisù and panna cotta, and its name, translated from Italian to English, would be "Grandmother's Cake." My own Italian grandmother has never made us this dessert -- she's more of a pan di spagna kind of gal -- but I wouldn't mind in the least if she did. Here we have a smooth custard filling bursting with bright lemon and sweet vanilla, sandwiched between buttery, citrus-y crusts, bejeweled with toasty pine nuts and finished off with a veil of snowy powdered sugar. It doesn't look like much -- no mile high layers, no frosting, no chunks of chocolate -- but it is a lovely, home-y dessert that exemplifies the expression "less is more," as most Italian desserts do, good with your afternoon tea or as an understated end to a meal. While it's true this has a few more steps than your average every day cake, you'll find that none of them are difficult, and I think you'll feel distinctly savvy as you whisk together your own custard and roll out your homemade crust, not so unlike an authentic, expert Italian grandmother.
A couple of notes: I found that I had a whole lot of dough leftover after fitting it to the tart pan -- so, if you end up with more dough don't worry! I was suspicious of the amount of cornstarch in the recipe -- 1/4 cup seemed like a lot -- but never fear, it works fine. When zesting the lemon for the crust and removing the peel for the filling, do your best to leave out the bitter white part (the pith). If you're not sure how to transfer your rolled out circle of pie dough to the tart pan, I usually roll it up over a floured rolling pin, then unroll it over the tart pan. Works like a charm.
In search of other pies and tarts? Click here!
TORTA DELLA NONNA
Recipe from www.giallozafferano.com. Serves 10.
Ingredients for the crust:
3 1/4 cups (450 grams) flour
14 tablespoons (200 grams) butter, cold, cut into small pieces
2 eggs
3/4 cup (160 grams) sugar
Zest of 1 lemon
Ingredients for the filling:
3 cups + 1 tablespoon (750 grams) whole milk
Peel of 1 lemon, cut into large pieces
1 cup (225 grams) sugar
3 eggs + 1 egg yolk
1/2 teaspoon vanilla extract
1/4 cup (35 grams) cornstarch
3.5 tablespoons (30 grams) flour
3 tablespoons (25 grams) pine nuts
Powdered sugar
Directions:
Start with the crust. In a large bowl, mix together the flour and the pieces of cold butter. Place the mixture in a food processor and pulse a few times until the butter and flour is well incorporated and looks like sand. Don’t have a food processor? You can also do this by hand, by breaking up the pieces of butter and flour with your hands until you get the same sand-like texture (it takes a bit longer but works just as well).
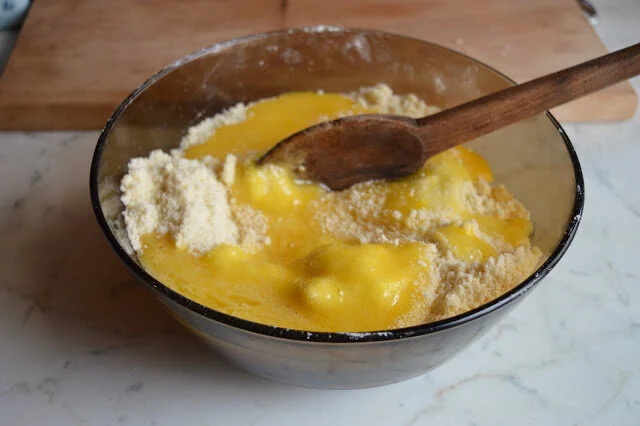
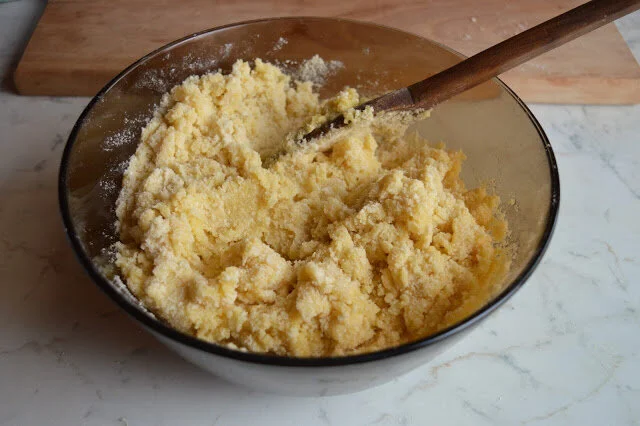
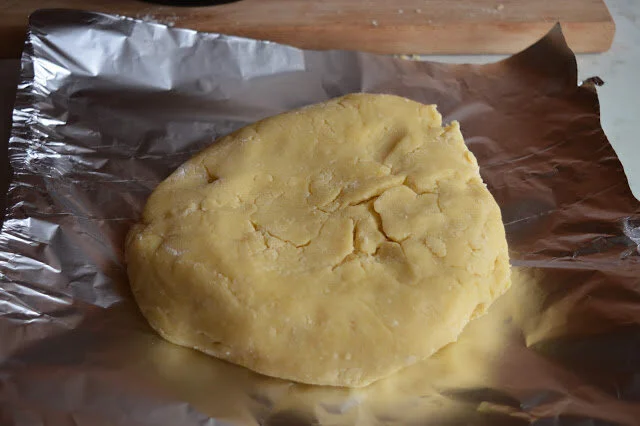
Set aside the flour-butter mixture. In a separate smaller bowl, whisk together the lemon zest, sugar, and eggs. Pour wet ingredients into the flour-butter mixture and use a wooden spoon to stir until a dough begins to come together. Turn the dough out onto a floured surface, knead it a few times to make a ball of dough, then wrap the dough in plastic wrap or aluminum foil and place it in the fridge.


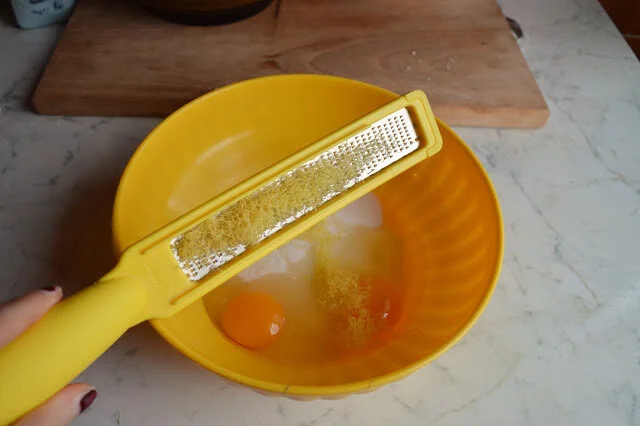
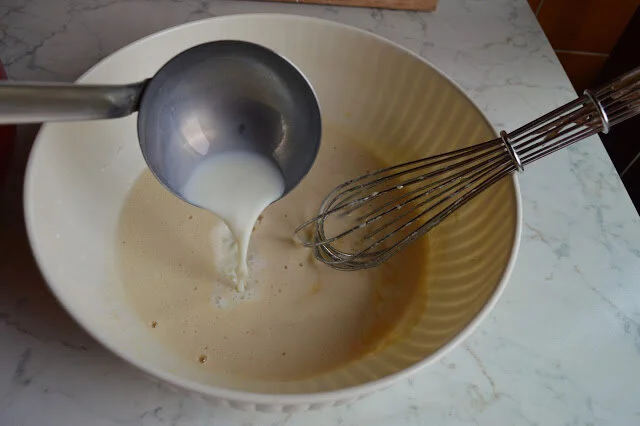
On to the filling! In a large bowl, whisk together the eggs and egg yolk, sugar, lemon zest, and vanilla. Next, add the cornstarch and flour whisk again until everything is well combined. In a large pot over low heat, mix together the milk and the lemon peel.
Bring the milk mixture to a bubble over low heat. Remove the lemon peel.
Slowly whisk the hot milk mixture into the egg mixture a little at a time to temper it, i.e don’t add all the milk at once otherwise you will end up with scrambled eggs. I usually take the pot off the stove and use a ladle to ladle the mixture in a little at a time, but if you have a sous chef or someone to help they can pour the milk into the egg mixture slowly for you as you do the whisking.
Once the milk is fully incorporated, pour the whole thing back into the pot on the stove. Cook the mixture until it turns into a custard, whisking often, about 10-15 minutes. The mixture will become thicker and creamier and will make your whole kitchen smell like lemons.
Pour the custard into a baking dish and cover it immediately with plastic wrap or aluminum foil to prevent a skin from forming. Let cool to room temperature.


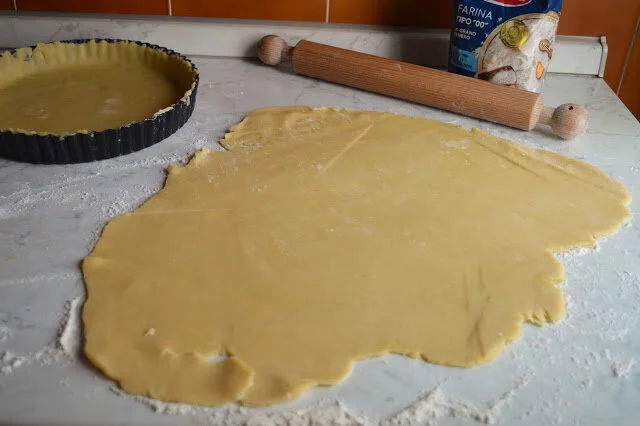
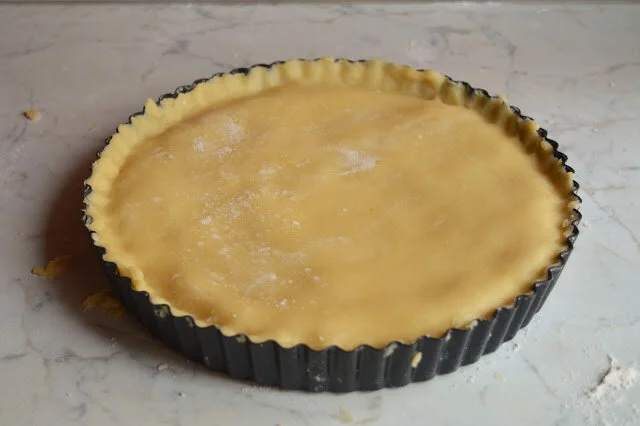
Last steps – preheat the oven to 350 degrees Fahrenheit and grab the dough that you put in the fridge. Divide it into two pieces, with one slightly larger than the other. Roll out the smaller piece of dough into a large circle and place it carefully into the bottom of a 9-inch diameter tart pan with a removable bottom. Cut off any extra dough so that it fits the pan, and then prick the dough with a fork.
Next, spoon the cooled custard into the bottom of the crust and smooth out with a spoon. Roll out the larger piece of dough into a circle, and place it over the top of the custard. Trim the dough again – like I said above, you will have lots of extra dough – and seal it together with the bottom crust, so that no custard escapes. Cut a few small vents into the top of the crust so that the steam can escape while baking (I remembered this step only when the torta was in the oven, meaning I had to go in and cut some emergency steam-releasing vents halfway into the baking -- don't be like me!)
Top the Torta with your pine nuts, pressing them down lightly so that they adhere to the crust. Bake for 50 minutes, or until the crust is light golden brown. If the Torta starts to brown too quickly, cover it with some aluminum foil. Let it cool completely before serving.